Chocolate Valentine's Day Rosette Cake


Chocolate Valentine’s Day Cake
With Ombre Rosette Buttercream Frosting
Valentine’s Day Needs a Makeover. Yes Venus is all for romance but I think everyone is looking at Valentine’s Day the wrong way. Wouldn’t it be a more wonderful holiday if we were to think of it as not a day to be celebrated just between couples but a day to acclaim love for all those you hold affection for or appreciate? Cherish is a word The Chocolate Goddess uses to describe your tender affection for your children and grandchildren, your fondness for the joy friends and family bring to you, your devotion for your pets, or a celebration of passion for a common denominator you share with a group or club.
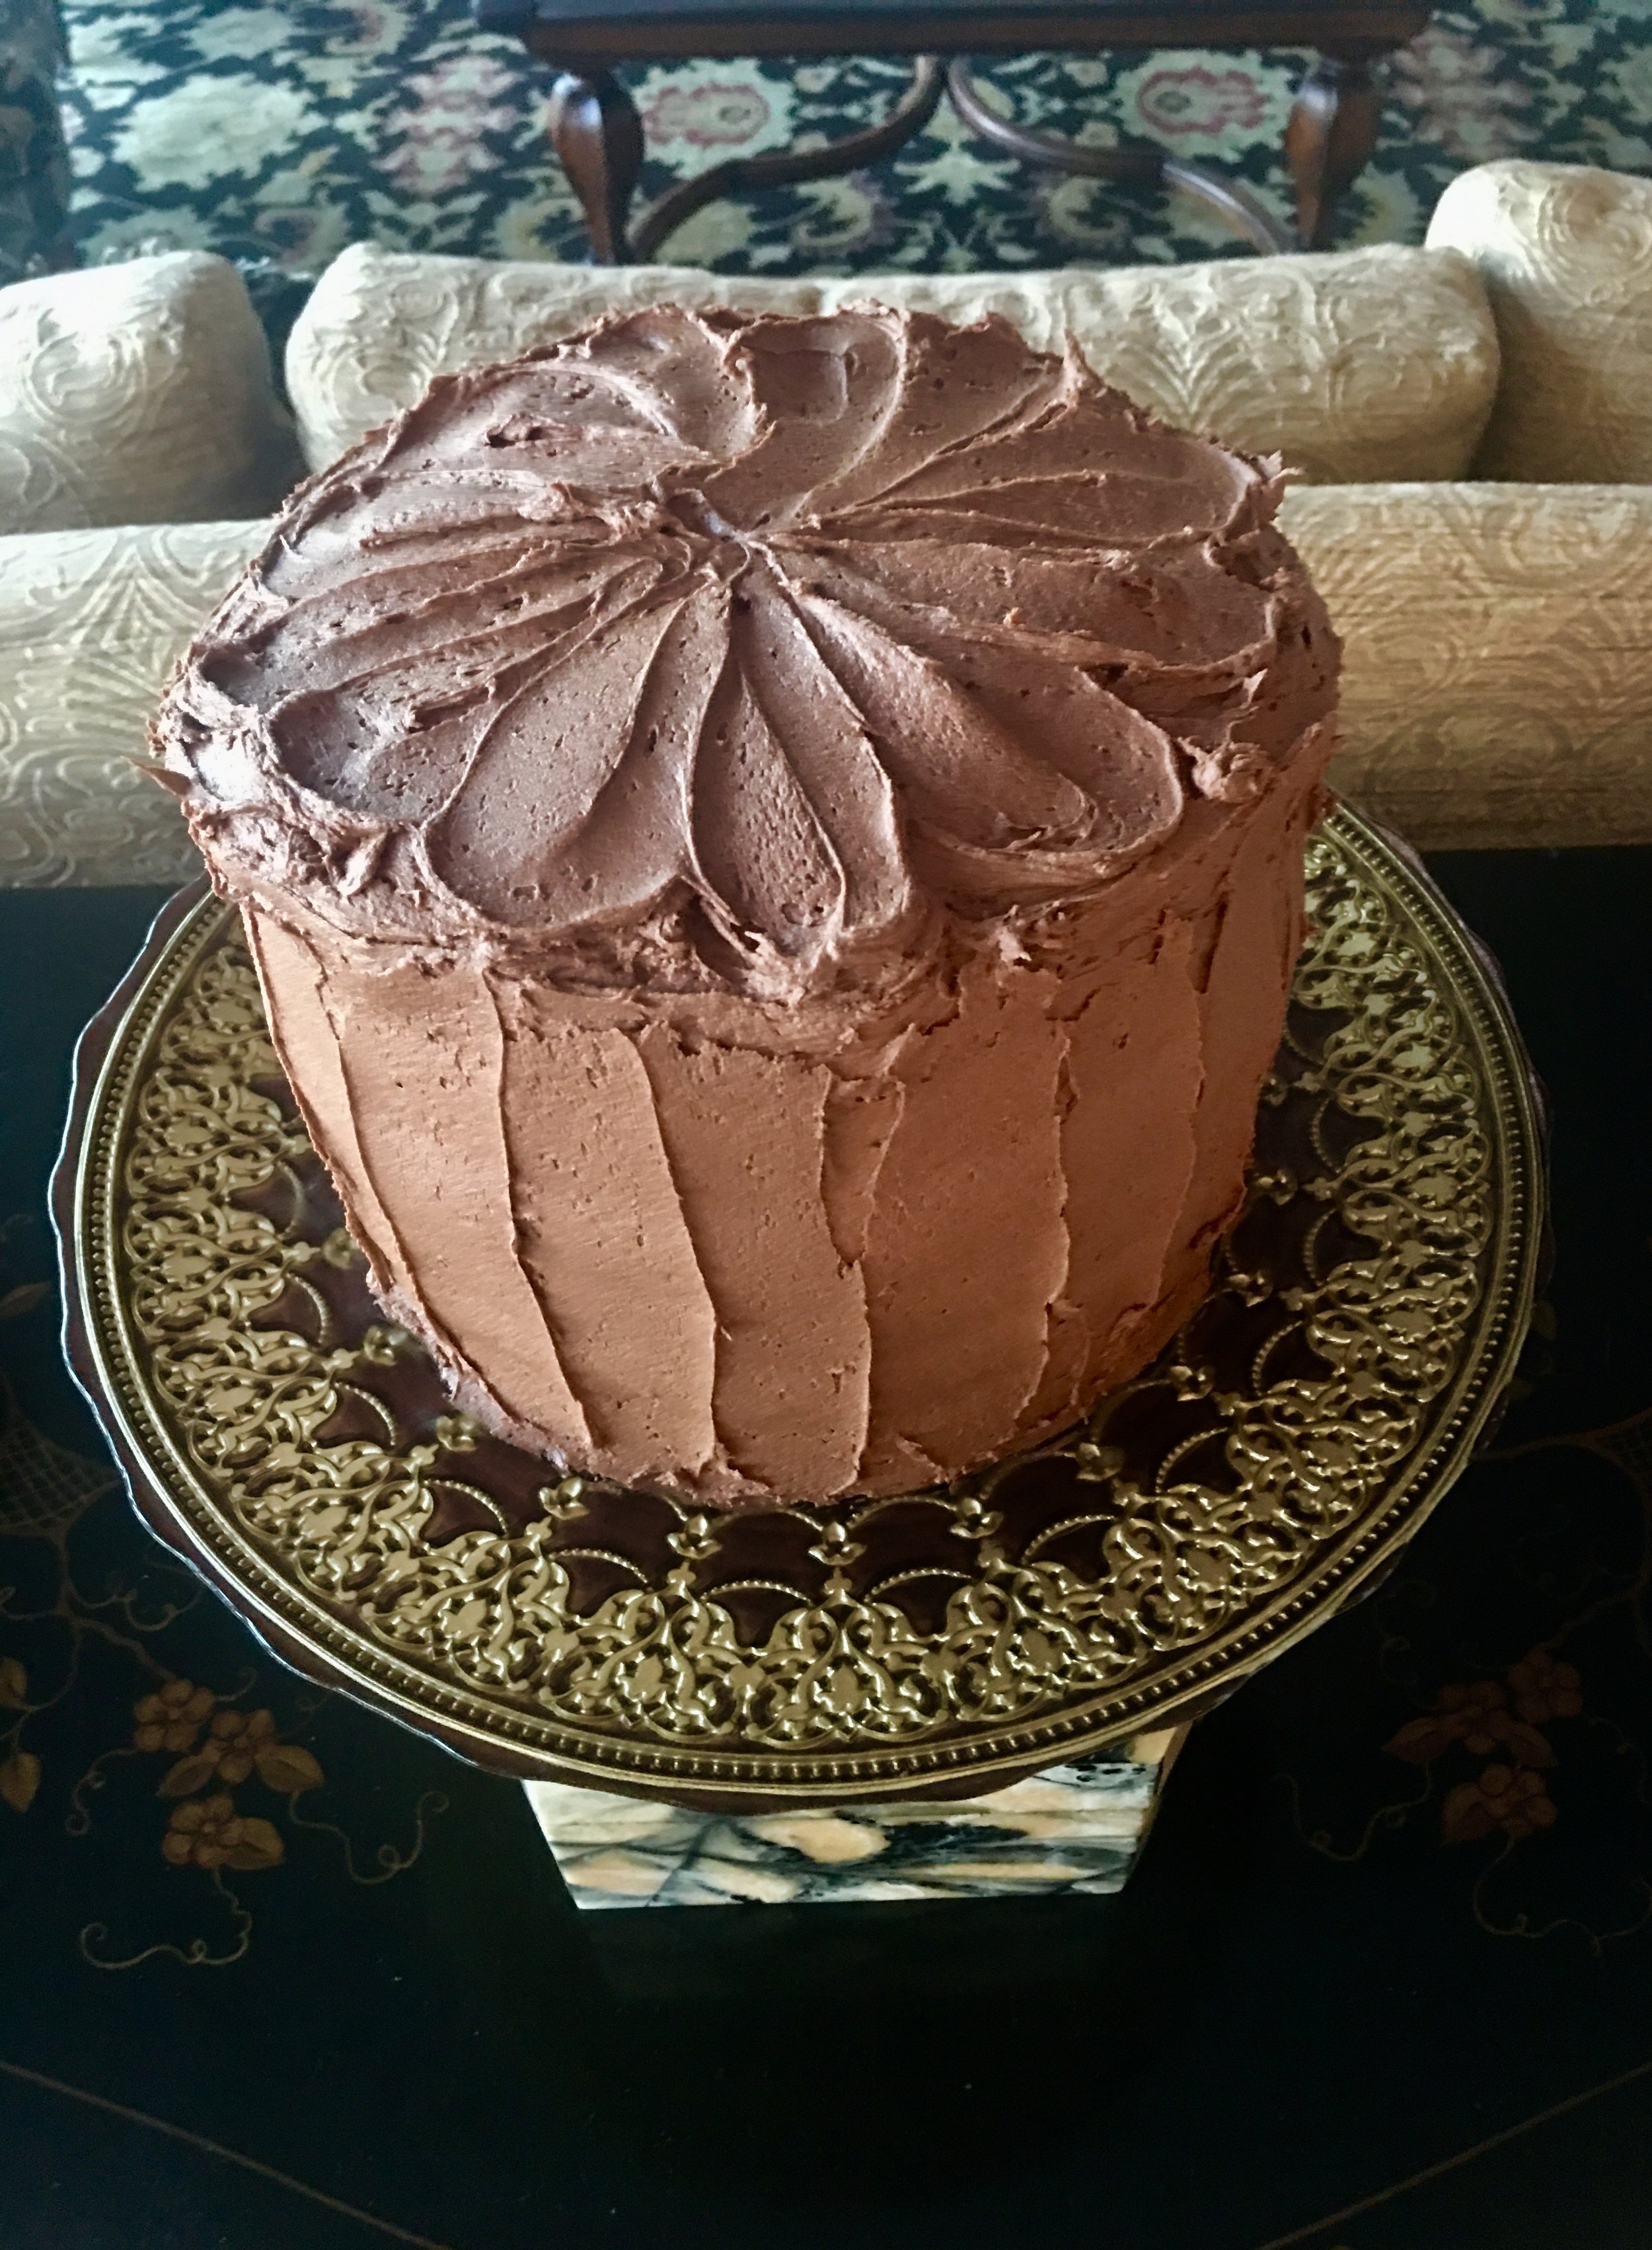
The one thing we can all agree on is the love and desire for chocolate cake and the enchantment that is experienced when seeing a beautifully decorated butter-cream frosted cake. Making ombre roses is quite simple and it gives the effect of a more complicated buttercream rose. Simply make your buttercream, divide it into three bowls with more for the lighter color and add varying amounts of colored gel (see below for details).
All you need are disposable piping bags and a Wilton® 1M piping tip. It is just a matter of making concentric circles one next to each other, you can do that, be a fearless goddess and try it. Experiment on a piece of waxed paper first if you like but do it! Your courage will pay off by making all you hold dear feel loved.
Happy Valentine’s Day to All
With Love,
The Chocolate Goddess

Chocolate Heart Cake Ingredients
3 cups All Purpose Flour
3 cups Granulated Sugar
1 cup Ghirardelli® Unsweetened Cocoa Powder, sifted
2 ½ teaspoons Baking Soda
1 ½ teaspoons Baking Powder
1 ½ teaspoons Salt
1 cup homemade Buttermilk
1 cup whole Milk plus 1 tablespoon White Vinegar makes homemade buttermilk. This makes the cake richer since store bought buttermilk eliminates too much fat content.
3 Large Eggs lightly whisked
¾ cup Vegetable Oil
1 tablespoon Pure Vanilla Extract
1 cup boiling Water
Simple Syrup Ingredients
1 cup of Water
1 cup of Sugar
3 tablespoons Butter
Ombre Rosettes Butter Cream Frosting Ingredients
3 pound, of Butter, brought to room temperature
6 boxes powdered sugar
1 tablespoon Pure Vanilla Extract
Heavy Cream to achieve spreading consistency
Wilton® Pink or Rose Gel Food Coloring

Instructions
There are many different size heart pans out there. The Chocolate Goddess likes a pan that is approximately 8 inch at the widest part. If you can only get a larger pan and want three layers, then multiply the recipe by 1.5. If you only want two layers, then shorten the length of your baking time
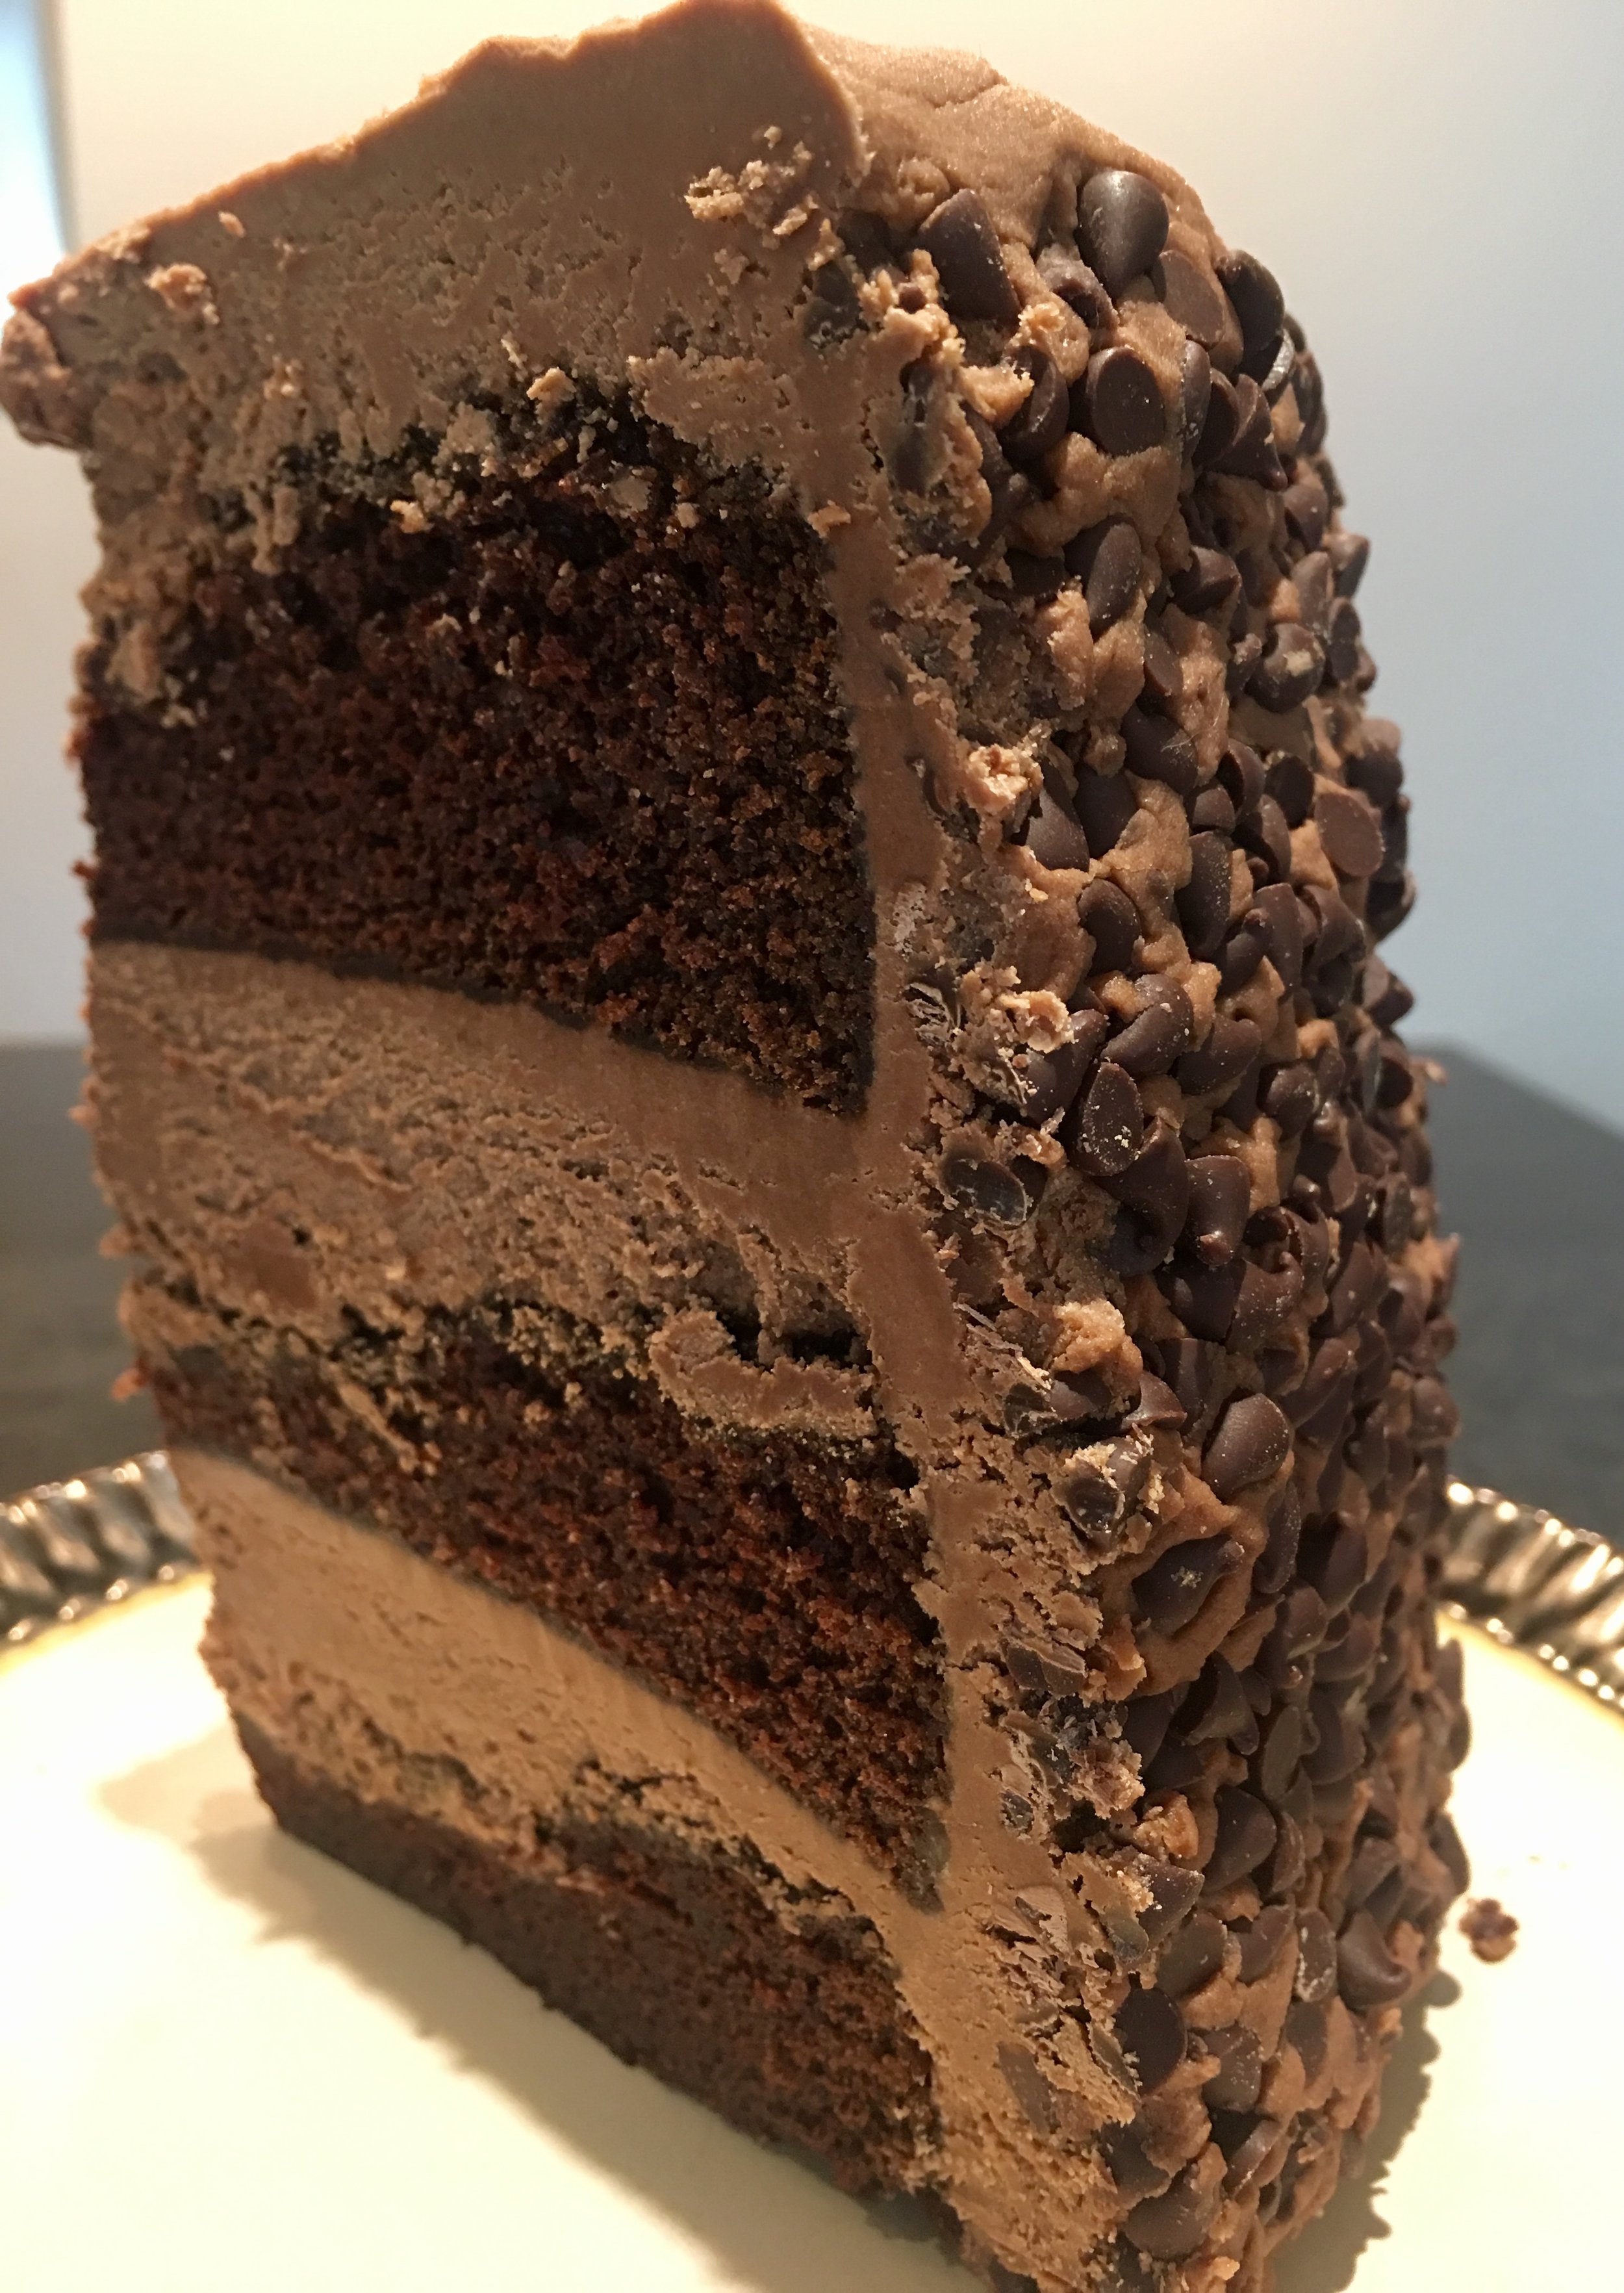
Chocolate Fudge Cake
Preheat oven to 350 degrees
Butter the interior of 3, 8 inch heart shaped cake pans with real butter.
Dust with flour and shake out excess.
Combine milk and vinegar, to make buttermilk, and set aside.
In a large bowl combine flour, sugar, sifted cocoa powder, baking soda, baking powder and salt.
Whisk eggs.
Add buttermilk, vanilla, and oil to eggs and whisk together.
Combine egg mixture with flour mixture on very low speed so dry mixture doesn’t fly out of the bowl.
Boil water and add. Mix on medium high speed for about 2 - 3 minutes, wiping down sides and bottom of bowl occasionally until all is combined.
Bake for 30 – 35 minutes, checking often at the end until toothpick inserted in center comes out clean.
Remove from oven and cool for 15 minutes.
Turn onto racks.
Simple Syrup
While cake is still warm, prepare simple syrup by adding all ingredients to a small saucepan and heating on low until sugar and butter is dissolved.
Poke holes gently in top of cake layers with toothpick.
Spoon on syrup to keep cake moist.
Frost when fully cool.
Ombre Rose Buttercream Frosting
This is meant to be a sturdy frosting to maintain the shape of the roses. Let your frosting come to room temperature for about 30 minutes to an hour, make sure it doesn’t get too soft. You can always do a test rose.

Fill your pastry bag and practice a few test rosettes on waxed paper to get the feel.

Start by squeezing out a center, then move to the left and then up and around once. Remember to start your next rose by judging where the center should be so that the sides of the roses are next to each other.
Let butter come to room temperature.
Beat butter until creamy.
Combine butter, powdered sugar and vanilla slowly so it doesn’t fly out of the mixing bowl.
Divide the mixture into 3 bowls allowing more to make the lightest color for a crumb layer, filling between layers and on top. Remember you are only doing sides of bottom layer with the darkest color and sides of middle layer with the medium pink
Slowly add colored gel to each to achieve desired color. I use a toothpick for this because the gel is so powerful.
Have a pedestal cake plate ready for added effect.
Carefully stack the layers with the lightest buttercream color between each.
Frost entire cake with crumb coating.
Starting with the darkest pink, frost bottom layer with rosettes, moving your hand in circles. Always try and end up at the same place with your swirl. Keep them close together.
For the next layer, move to medium color and make rosettes.
Lastly, use the lightest color pink for rosettes on sides and top of the crowning layer.